
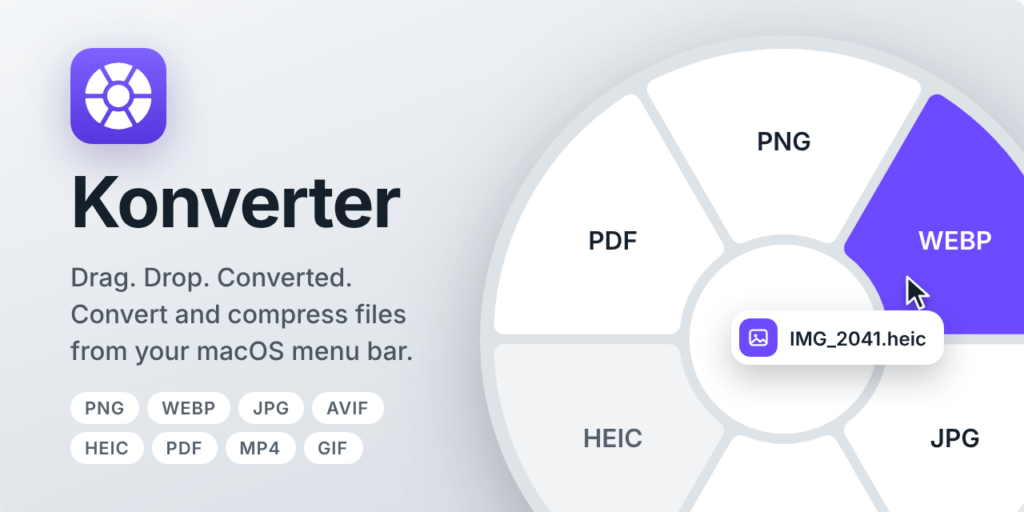
The converter is a free file converter for macOS that converts files and prepares images for the web. I primarily made it for myself, but since open-source tools have helped me a lot in my work over the past few years, I am sharing it publicly. It is open-source (MIT) And on GitHub. You drag the file and hold down Shift, drop it on the format and that's it.
Why
I very often convert formats while working: HEIC to JPG or PNG, PNG to WebP, sometimes even video to GIF. I prepare images for the web just as often. Online apps require multiple clicks, are slow, and require downloads. Regular apps are not much better: you open a window, find the file, choose the format, click. I wanted something that's ready when I already have the file in hand.
How it works
After starting, the converter is located in the menu bar and waiting. When you start dragging files in the Finder and hold down the button Shift, It opens when the mouse cursor is moved bicycle with formats. You drop the files onto the one you need.
The processed file is saved alongside the original and is not overwritten (unless you choose to replace the original in the FOR WEB tool settings; in that case, the original goes into the trash). If the name already exists, it gets a number, for example fotka (1).webp. You can also upload multiple files at once.
It converts images to PNG, WEBP, JPG, AVIF, HEIC, PDF, TIFF, and BMP. It converts video to MP4, GIF, and M4A (audio only). The formats are intentionally as many as I use.
During the drag, the middle of the wheel shows the number of files and their total size. When the file is converted, the converter communicates this with a little humor right there.
How to convert HEIC to JPG on Mac
Drag the HEIC photo from Finder, hold it Shift and drop it into JPG in the carousel. The JPG is saved alongside the original; the original remains untouched. You can also drop multiple photos at once.
Preparing images for the web and deleting meta data
If you hold down the Shift key instead of the ⌘ Command, the second round opens with two tools.
FOR WEB (PNG, JPG, WEBP, HEIC) prepares the image for online publication in one step. You set the maximum length of the page (original, 3840, 2560, 1920, 1600, 1280, 1024 or 800 px): the larger image is reduced, the smaller one is enlarged. Then it is compressed with the selected quality, the colors are converted to sRGB and the meta data is removed. Save it as a .web file or replace the original (this goes into the trash). PNG remains without loss of quality, colors are not reduced. If the size does not change and the file does not become smaller, nothing is saved and the Converter warns you. You can find all settings in Settings.
STRIP METADATA (JPG, PNG, HEIC, WEBP) scrapes the EXIF, location, and other information that the image carries with it. It saves it as name-clean.
Which format to choose
- JPG for photos: it is small and works everywhere, but it does not support transparency.
- PNG For logos, icons, and screenshots: the sharp edges and transparency remain, and in photos it is much larger than JPG.
- WEBP For the web: with comparable quality, it is usually smaller than JPG and PNG, and it also supports transparency.
- AVIF It is often even smaller than WEBP, but older browsers and programs do not always support it, so before using it check the support.
- HEIC It's the format of iPhone photos. It's small, and not all programs open it, so I convert it to JPG for sharing.
- PDF I use it when I need the image as a document.
- GIF It is suitable for short animations, MP4 for regular video, and M4A for audio.
- TIFF It has no loss of quality and is used by printing and archives. The files are large and not suitable for the web.
- BMP It is an old, uncompressed format. The files are very large, so use it only when an older program requires it.
When you publish the image online, first convert it to WEBP, then prepare it with the FOR WEB tool.
To whom is the Converter intended?
The converter is a file converter for everyone who often works with images: designers, developers, and website editors. The files remain on your Mac; nothing is uploaded to foreign servers.
It is designed for low energy consumption: it only runs when you use it, so it doesn't drain the battery when it's idle.
The MIT license means that the Converter is free and you can use it without restrictions and subscriptions even when working in the office.
Settings
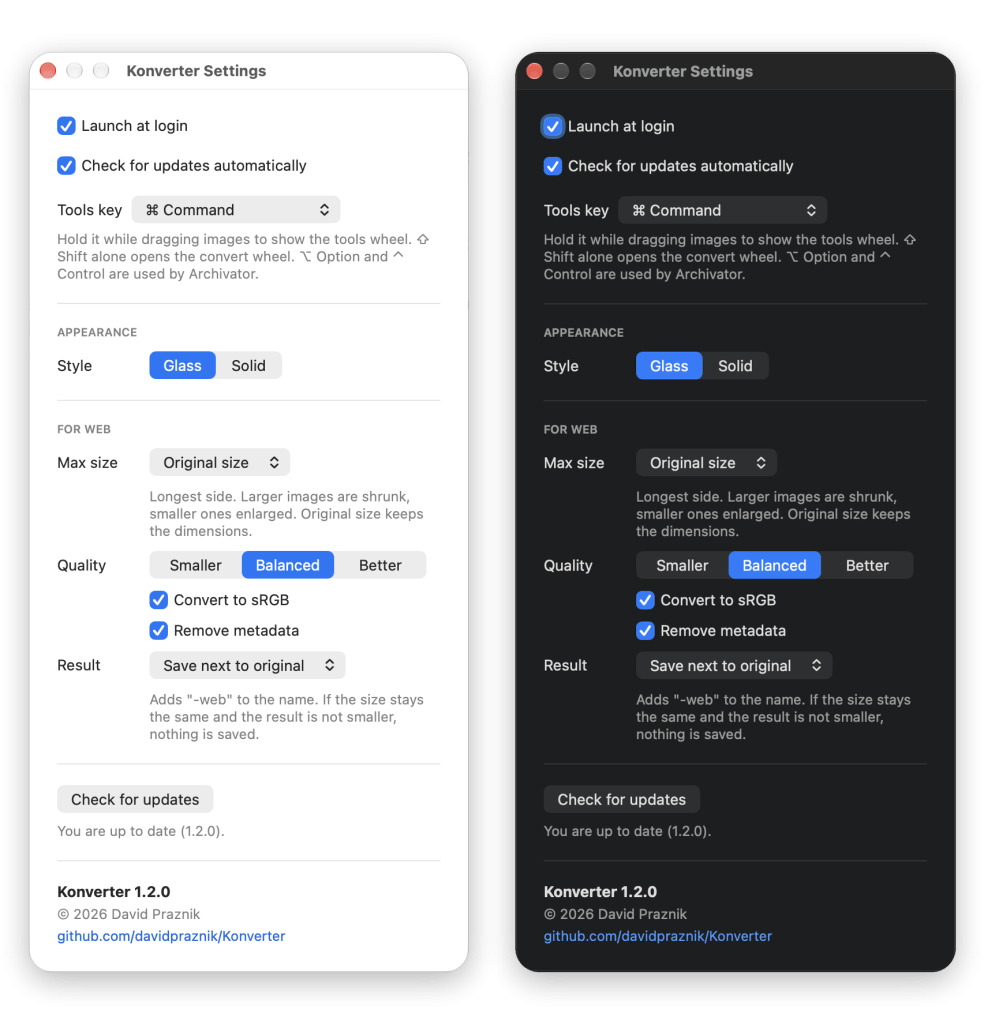
The app allows for automatic startup upon login (Launch at login) and checking for updates via GitHub (Check for updates automatically), optionally once a day automatically. You install it manually.
You choose the wheel style under Style: Glass (transparent glass, by default) or Solid (full background). Under For web, you set the maximum image size, quality, conversion to sRGB, deleting meta data, and whether the result is saved alongside the original or replaces it. If, when switching applications with ⌘ Tab while holding down a file, another wheel is accidentally opened, it changes the tool key in the settings..
What you need to know
- You need macOS 14.6 or newer; I tested it on macOS 27.
- Apple has not reviewed these apps (and they are not available on the App Store), so they must be opened manually the first time they are launched. This is usually the case for open source applications.
- It does not use App Sandbox.
- The interface is in English.
Transfer
The converter has its own GitHub page Converter on GitHub, You can find the latest version among the releases. Releases.
If you're still looking for archiving, check it out Archivist, my second application in the menu bar (code on GitHubThey can both work at the same time, as the Converter uses Shift and ⌘ Command, and the Archivator uses ⌥ Option.


